 A tutorial on how to create a mini web application with Alien-Factory's BedSheet suite of libraries.
A guide to serving web pages, posting forms, and uploading files.
This article re-writes the same mini web application as in Create a Mini Web Application with Wisp but using the Alien-Factory BedSheet suite of libraries.
BedSheet is pluggable, customisable, and massively extensible. As such there are many compatible BedSheet libraries that make light work of the common problems in web development.
This article serves to be a light introduction to BedSheet, Pillow, FormBean, and Slim. It assumes the reader is already able to set up a Fantom project, build .pod files, and run code.
Contents
- Starting BedSheet
- Serving Web Pages
- Serving Web Pages with Pillow
- Posting Forms
- Posting Forms with FormBean
- Uploading Files with FormBean
- Tidy Up - Use Slim Templates
- BedSheet / Wisp Comparison
- Complete Example
For reference this tutorial was written with Fantom 1.0.69 and the following set of dependencies. You may copy the depends declaration and paste it in your own build.fan.
depends = [
    "sys        1.0.73 - 1.0",

    "afIoc      3.0.8  - 3.0",
    "afBedSheet 1.5.14 - 1.5",
    "afEfanXtra 2.0.2  - 2.0",
    "afPillow   1.2.0  - 1.2",
    "afFormBean 1.2.6  - 1.2",
    "afSlim     1.3.0  - 1.3",
]
1. Starting BedSheet
BedSheet is actually a WebMod like any other and runs under Wisp, and can be setup and run as such. But it also comes with some handy methods to build and run a WispService instance right out of the box. We'll use these!
BedSheet leverages most of its power from being an IoC container. And as such most BedSheet web applications have an AppModule class where all application configuration may be centralised.
Our AppModule will configure the BedSheet Routes service to return the text Hello Mum! for every GET request.
using afIoc::Contribute
using afIoc::Configuration
using afBedSheet::BedSheetBuilder
using afBedSheet::Route
using afBedSheet::Routes
using afBedSheet::Text

class Main {
    Int main() {
        BedSheetBuilder(AppModule#.pod.name).startWisp(8069, true, "dev")
    }
}

const class AppModule {
    @Contribute { serviceType=Routes# }
    Void contributeRoutes(Configuration config) {
        config.add(Route(`/*`, Text.fromPlain("Hello Mum!")))
    }
}
Note the line: BedSheetBuilder(...).startWisp(8069, true, "dev")
The true tells BedSheet to start a web proxy to the real instance of the web application. In short this enables BedSheet to automatically re-start your web application every time you recompile your pod. This means you need only refresh your browser to see your latest changes! But note, it only works if your application is compiled into a pod. If running a script, then you must set this parameter to false.
The "dev" tells BedSheet to run in development mode. In development mode the standard 404 and 500 pages are replaced with detailed report pages that help you debug what went wrong. Note that these pages themselves are customisable and you can add your own information to them.
Anyway, running the program and pointing a browser at http://localhost:8069/ gives us:
2. Serving Web Pages
To serve different pages from different URLs we only need to alter the Routes configuration. Here we'll map the URL `/` to the method IndexPage.onGet(). BedSheet will automatically serve 404 pages for everything else.
BedSheet has the philosophy that route handlers, such as onGet(), shouldn't manipulate the HTTP response directly, but rather return a response object such as a File, a HttpStatus, or Err. It's then the job of a Response Processor to pipe the object to the HTTP response. This lets the application deal with macro objects without having to worry about detailed specifics of the response.
As such, our onGet() route handler will return a HTML Text object.
const class AppModule {
    @Contribute { serviceType=Routes# }
    Void contributeRoutes(Configuration config) {
        config.add(Route(`/`, IndexPage#onGet))
    }
}

class IndexPage {
    Obj onGet() {
        Text.fromHtml("<!DOCTYPE html>
                       <html>
                       <head>
                           <title>Wisp Example</title>
                       </head>
                       <body>
                           <h1>Hello Mum!</h1>
                       </body>
                       </html>")
    }
}
Which serves up a page like this:
3. Serving Web Pages with Pillow
Having to manually specify and map URLs to route handlers is pretty tedious, so the Pillow library introduces some convention over configuration. It takes each class annotated with @Page and routes a URL to it, based on the class name.
First it drops any "Page" suffix on class names, then it maps the word "Index" to "/", so the class IndexPage is mapped to just /.
And because Pillow does all the routing for us, we can delete the AppModule class.
On to... templating.
Pillow extends efanXtra which uses efan (Embedded FANtom) templates.
Usually we would keep our page templates as separate files, but for ease of use in this tutorial we're going to use a nifty feature of efanXtra that lets us use fandoc comments as templates! But because we're doing that, we have to also manually set the content type.
using afBedSheet::BedSheetBuilder
using afEfanXtra::EfanComponent
using afPillow::Page

class Main {
    Int main() {
        BedSheetBuilder(AppModule#.pod.name).startWisp(8069, true, "dev")
    }
}

const class AppModule { }

** template: efan
**
** <!DOCTYPE html>
** <html>
** <head>
**     <title>Wisp Example</title>
** </head>
** <body>
**     <h1>Hello Mum!</h1>
** </body>
** </html>
@Page { contentType=MimeType("text/html") }
class IndexPage : EfanComponent { }
4. Posting Forms
To post a form we first need to update the IndexPage to incorporate a form:
using afBedSheet::BedSheetBuilder
using afEfanXtra::EfanComponent
using afPillow::Page

class Main {
    Int main() {
        BedSheetBuilder(AppModule#.pod.name).startWisp(8069, true, "dev")
    }
}

const class AppModule { }

** template: efan
**
** <!DOCTYPE html>
** <html>
** <head>
**     <title>Post Form Example</title>
** </head>
** <body>
**     <h1>Post Form</h1>
**     <form method='POST' action='/postForm'>
**         <label for='name'>Name</label>
**         <input type='text' name='name'>
**         <br/>
**         <label for='beer'>Beer</label>
**         <input type='text' name='beer'>
**         <br/>
**         <input type='submit' />
**     </form>
** </body>
** </html>
@Page { contentType=MimeType("text/html") }
class IndexPage : EfanComponent { }
To service the URL /postForm we need to add a new Pillow Page class. We'll call it PostFormPage, and in the @Page facet we'll set the HTTP method to POST and explicitly set the URL.
using afIoc::Inject using afEfanXtra::InitRender using afBedSheet::HttpRequest** template: efan**** <!DOCTYPE html>** <html>** <head>** <title>Post Form Values</title>** </head>** <body>** <p>Hello <b><%= name %></b>, you like <b><%= beer %></b>!</p>** </body>** </html>@Page { httpMethod="POST"; contentType=MimeType("text/html"); url=`/postForm` } class PostFormPage : EfanComponent { @Inject HttpRequest httpReq Str? name Str? beer new make(|This| f) { f(this) } @InitRender Void initRender() { name = httpReq.body.form["name"] beer = httpReq.body.form["beer"] } }
The above code introduces the @InitRender method which is called before the page renders. Here we are able to extract information from the submitted form and set them as field values.
BedSheet and Pillow use the standard Fantom it-block ctor to inject the HttpRequest object in to the Page class.
Note the efan markup notation of <%= xxx %> which is able to read field values from the mixin and output them in the template. That's the beauty of efanXtra templates, they are able to interact with their associated class, including calling methods and rendering other templates.
The submitted form produces the following:
5. Posting Forms with FormBean
FormBean is a fantastic library that renders Fantom objects as HTML forms. To use it, we first need to encapsulate our form data as Fantom object:
using afFormBean::HtmlInput

class BeerDetails {
    @HtmlInput Str? name
    @HtmlInput Str? beer
}
We can then update IndexPage to use FormBean to render our BeerDetails class as a HTML form:
using afFormBean::FormBean** template: efan**** <!DOCTYPE html>** <html>** <head>** <title>Post Form Example</title>** </head>** <body>** <h1>Post Form</h1>** <form method='POST' action='/postForm'>** <%= formBean.renderBean(null) %>** <%= formBean.renderSubmit() %>** </form>** </body>** </html>@Page { contentType=MimeType("text/html") } class IndexPage : EfanComponent { @Inject { type=BeerDetails# } FormBean formBean new make(|This| f) { f(this) } }
But the clever part about FormBean is that it can validate and reconstitute HTML form data back into a Fantom object instance! Our new PostFormPage does just that and uses the new BeerDetails instance in the template:
** template: efan**** <!DOCTYPE html>** <html>** <head>** <title>Post Form Values</title>** </head>** <body>** <p>Hello <b><%= details.name %></b>, you like <b><%= details.beer %></b>!</p>** </body>** </html>@Page { httpMethod="POST"; contentType=MimeType("text/html"); url=`/postForm` } class PostFormPage : EfanComponent { @Inject { type=BeerDetails# } FormBean formBean BeerDetails? details new make(|This| f) { f(this) } @InitRender Void initRender() { formBean.validateHttpRequest() details = formBean.createBean() } }
Above is only a basic utilisation of FormBean so it doesn't save us much code. But then again, we only have 2 basic text field inputs. The code would be exactly the same if we had 10 or 20 inputs!
Note that FormBean is able to render all manner of HTML inputs (including select boxes, checkboxes, and radio buttons) and perform client side & server side validation.
6. Uploading Files with FormBean
This is another place where FormBean excels.
First update the HTML <form> element to submit multipart form-data (essential for file uploads):
<form method='POST' action='/postForm' enctype='multipart/form-data'>
Then to have FormBean handle the file upload, we only need to add an extra field to BeerDetails:
class BeerDetails {
    @HtmlInput  Str?  name
    @HtmlInput  Str?  beer
    @HtmlInput  File? photo
}
The code in the PostFormPage class stays the same. We just need to add a couple more lines to the template to output the uploaded file:
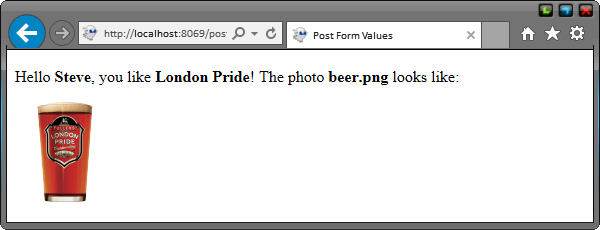
** template: efan**** <!DOCTYPE html>** <html>** <head>** <title>Post Form Values</title>** </head>** <body>** <p>** Hello <b><%= details.name %></b>, you like <b><%= details.beer %></b>!** The photo <b><%= details.photo.name %></b> looks like:** </p>** <img src="data:<%= details.photo.mimeType %>;base64,<%= details.photo.readAllBuf.toBase64 %>">** </body>** </html>@Page { httpMethod="POST"; contentType=MimeType("text/html"); url=`/postForm` } class PostformPage : EfanComponent { @Inject { type=BeerDetails# } FormBean formBean BeerDetails? details new make(|This| f) { f(this) } @InitRender Void initRender() { formBean.validateHttpRequest() details = formBean.createBean() } }
The net result is that we end up with this web page:
7. Tidy Up - Use Slim Templates
HTML is clunky. It has too much punctuation making it hard to type. And if you miss out an end tag or miss type a void tag, you'll never know until it doesn't render in Internet Explorer or some other obscure browser. Just like it's Javascript counterpart, it is functional but ugly.
So enter Slim. Based on the Ruby library of the same name, Slim reduces HTML syntax without becoming cryptic. It is indentation driven and has CSS style shortcuts for #id and .class attributes.
Slim is IoC aware, so just by adding the Slim pod to our project it configures efanXtra to recognise slim templates. That means we can jump straight in and re-write our IndexPage as:
** template: slim**** doctype html** html** head** title Post Form Example** body** h1 Post Form** form (method='POST' action='/postForm' enctype='multipart/form-data')** == formBean.renderBean(null)** == formBean.renderSubmit()@Page { contentType=MimeType("text/html") } class IndexPage : EfanComponent { ... }
See below for the PostformPage slim template.
8. BedSheet / Wisp Comparison
Comparing the BedSheet code below with the wisp code in the previous article heralds about a 40% reduction in code (~100 lines vs ~60 lines).
There's also a better separation of concerns with respect to page classes, data classes, and templates.
Not to mention the added benefits of BedSheet with regards to development; no application re-starts (just refresh the browser page), extensive error and 404 handling, and dedicated testing frameworks.
And now that you're in the land of BedSheet, a world of potential has just opened up; add site maps, RSS feeds, and asset caching in seconds! See the Eggbox Pod Repository for details.
9. Complete Example
Below is the complete BedSheet example that:
- Uses BedSheet and IoC as the web application container
- Uses Pillow to route URLs to page classes
- Uses FormBean to render HTML forms and handle file uploads
- Uses Slim to render concise HTML
Note the BedSheet code below is about half the size of the plain Wisp example.
using afIoc::Inject
using afBedSheet::BedSheetBuilder
using afBedSheet::HttpRequest
using afEfanXtra::InitRender
using afEfanXtra::EfanComponent
using afPillow::Page
using afFormBean::FormBean
using afFormBean::HtmlInput

class Main {
    Int main() {
        BedSheetBuilder(IndexPage#.pod.name).startWisp(8069, true, "dev")
    }
}

** template: slim
**
** doctype html
** html
** head
**     title Post Form Example
** body
**     h1 Post Form
**     form (method='POST' action='/postForm' enctype='multipart/form-data')
**         == formBean.renderBean(null)
**         == formBean.renderSubmit()
@Page { contentType=MimeType("text/html") }
class IndexPage : EfanComponent {
    @Inject { type=BeerDetails# }
    FormBean formBean

    new make(|This| f) { f(this) }
}

** template: slim
**
** doctype html
** html
**     head
**         title Post Form Values
**     body
**         p
**             Hello <b>${details.name}</b>, you like <b>${details.beer}</b>!
**             The photo <b>${details.photo.name}</b> looks like:
**     img (src="data:${details.photo.mimeType};base64,${details.photo.readAllBuf.toBase64}")
@Page { httpMethod="POST"; contentType=MimeType("text/html"); url=`/postForm` }
class PostFormPage : EfanComponent {
    @Inject { type=BeerDetails# }
    FormBean       formBean
    BeerDetails?   details

    new make(|This| f) { f(this) }

    @InitRender
    Void initRender() {
        formBean.validateHttpRequest()
        details = formBean.createBean()
    }
}

class BeerDetails {
    @HtmlInput  Str?  name
    @HtmlInput  Str?  beer
    @HtmlInput  File? photo
}
Have fun!
Edits
- 24 Feb 2020 - Updated pods and corresponding code to latest versions.
- 31 Dec 2016 - Original article.